~/hub / custom-maps / wanted-bo3-custom

Workshop screenshot of the white wooden church with its bell tower, among dead trees and gravestones, Wanted BO3 Custom, Call of Duty Black Ops III Zombies

Wanted BO3 Custom:
Easter Egg

The main quest of Wanted BO3 Custom step by step: skulls and werewolf, the code of the barn, the ghost round, the portal of the church, the totems, Leroy and the DeLorean.

  • 7 min read
  • 11 chapters
  • updated

Before starting

The main quest of Wanted sends the players back to the future: four parts have to be found to repair the DeLorean parked in the barn, and the last one is dropped by Leroy, the boss of the map. The Workshop page warns that the map “should keep casual entertained but should also put the pro to the test if they want to complete the Main quest”. The quest can be played solo or in co-op: in co-op, every player has to stand in the circle that starts the boss fight.

The steps below follow the Steam guide of OGJasperG, posted in the discussions of the Workshop page, and the video guides of Sassy Asi, WOOLF, Not So Serious Gaming, Kunjora (60 Second Guides), Pankake101 and Flapix, which give the same order. The quest list is shown on the HUD: Pankake101 points to the “main quest” counter at the bottom of the screen, with the parts found out of four.

What to bring

Pankake101 advises Double Tap, Speed Cola, Juggernog and PhD Flopper, a weapon with a large ammo pool for the werewolf, and a Pack-a-Punched weapon for the last totem and the boss.

Instakill

Pankake101 notes a glitch never patched: a kill under Insta-Kill only gives 10 points. The change notes of version 1.4 and 1.5 both tried to fix an Insta-Kill issue.

Do not die in the boss fight

WOOLF warns that dying during the boss fight is almost always the end of the attempt, because Juggernog is hard to get back from where it stands.

Step 1: power and the two skulls

  1. Turn on the power: a valve on the left side of the Hotel, on the main street. Sassy Asi turns the wheel until the gauge reaches 60; WOOLF describes it as building up steam pressure.
  2. Find two skulls, shown on the HUD. They spawn at two of six places, which change from game to game (see the table below). Pankake101 warns that they blend into the scenery.
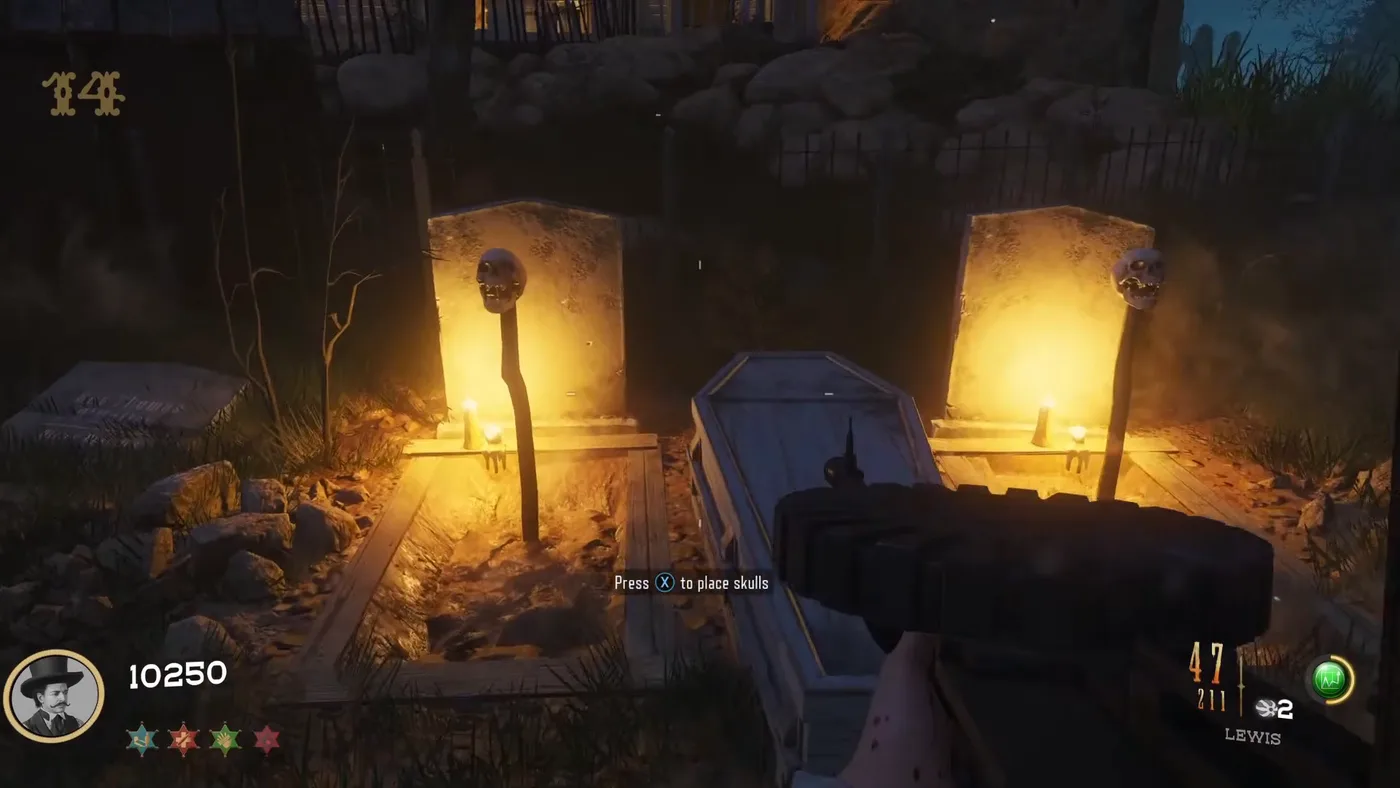
  3. Open the Graveyard and place the skulls on the two wooden sticks poking out of the graves.
Skull spotBuilding
On the chair of the balcony, upstairsSaloon
Behind the bar, in a crateSaloon
On the counter, next to the cash registerGrocery store, which Flapix calls the Juggernog building
On a table, next to the cell of a perk machineSheriff’s Office
On the chest of drawers next to the stairsHotel
On the right of the perk machineUndertaker

Sassy Asi, DosKit, WOOLF, OGJasperG and Flapix list these six spots; Not So Serious Gaming and Pankake101 speak of five.

A white skull on a wooden table by the staircase of the Hotel, beside a candle, Wanted BO3 Custom, Call of Duty Black Ops III Zombies

Skull in the Hotel

A skull on the table by the stairs of the Hotel, next to a candle and a fan.

A white skull by a wooden chair and a small table on an upstairs balcony at night, Wanted BO3 Custom, Call of Duty Black Ops III Zombies

Skull on the balcony

A skull by a chair of an upstairs balcony, at night; Sassy Asi films it while naming the balcony of the Saloon.

Two lit gravestones with wooden sticks in the Graveyard, a skull on each stick, with the prompt to place skulls, Wanted BO3 Custom, Call of Duty Black Ops III Zombies

The two sticks

The two graves of the Graveyard with their sticks, a skull on each, and the prompt “Press to place skulls”.

Step 2: the werewolf and the key

Placing the skulls opens a coffin: ghosts fly out and a werewolf, which OGJasperG traces to the Black Ops 4 map Dead of the Night, comes out to fight. It is slow to kill rather than dangerous: Pankake101 calls it “the most annoying step” and buys ammo several times; Pack-a-Punch is not open yet. Pankake101 thinks that there is one werewolf per player, and Flapix says there are more werewolves with more players; two came out in the two-player game of Pankake101. A key appears at the grave: pick it up.

Step 3: the three colored numbers

  1. Use the key on the locked case by the barn of the side street, next to the Blacksmith. It reveals a panel of three digits, one red, one yellow and one blue.
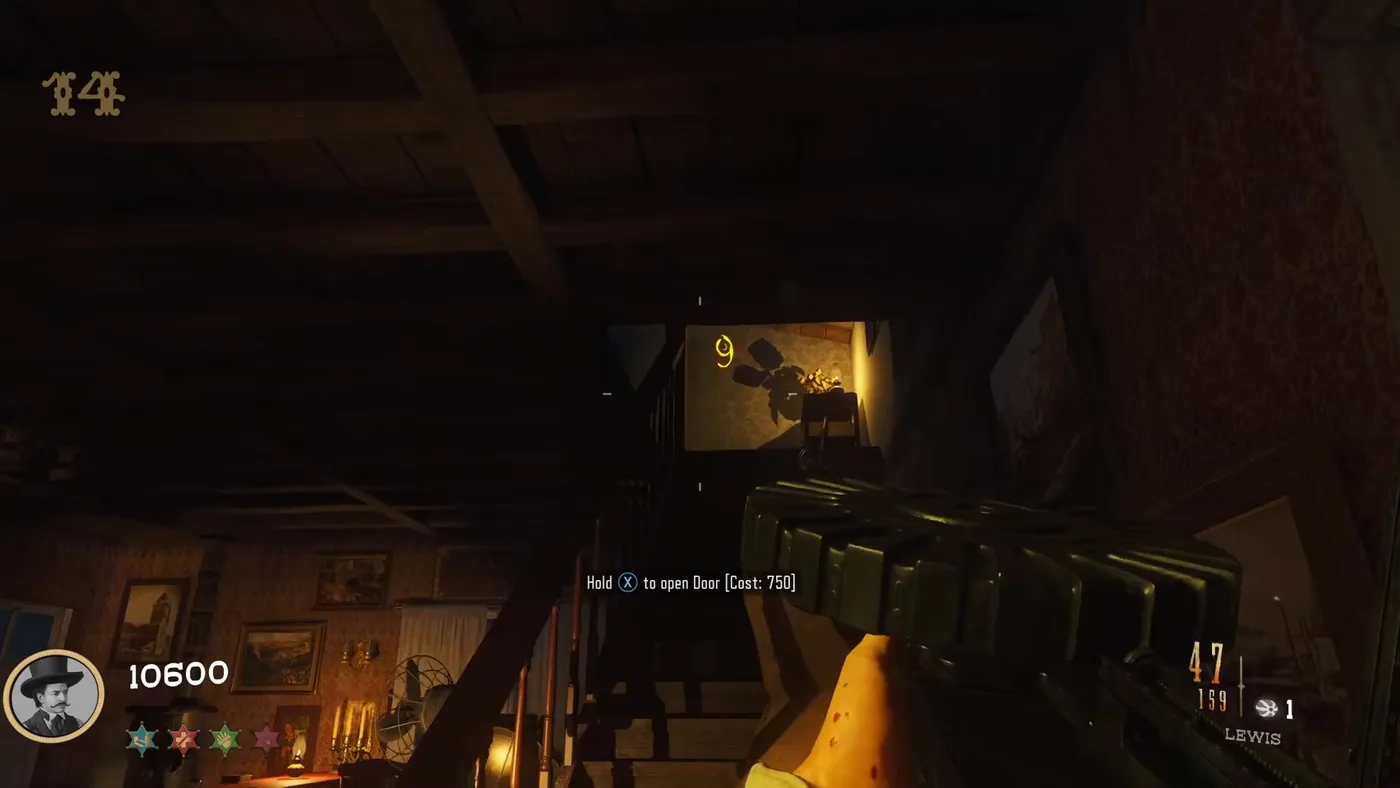
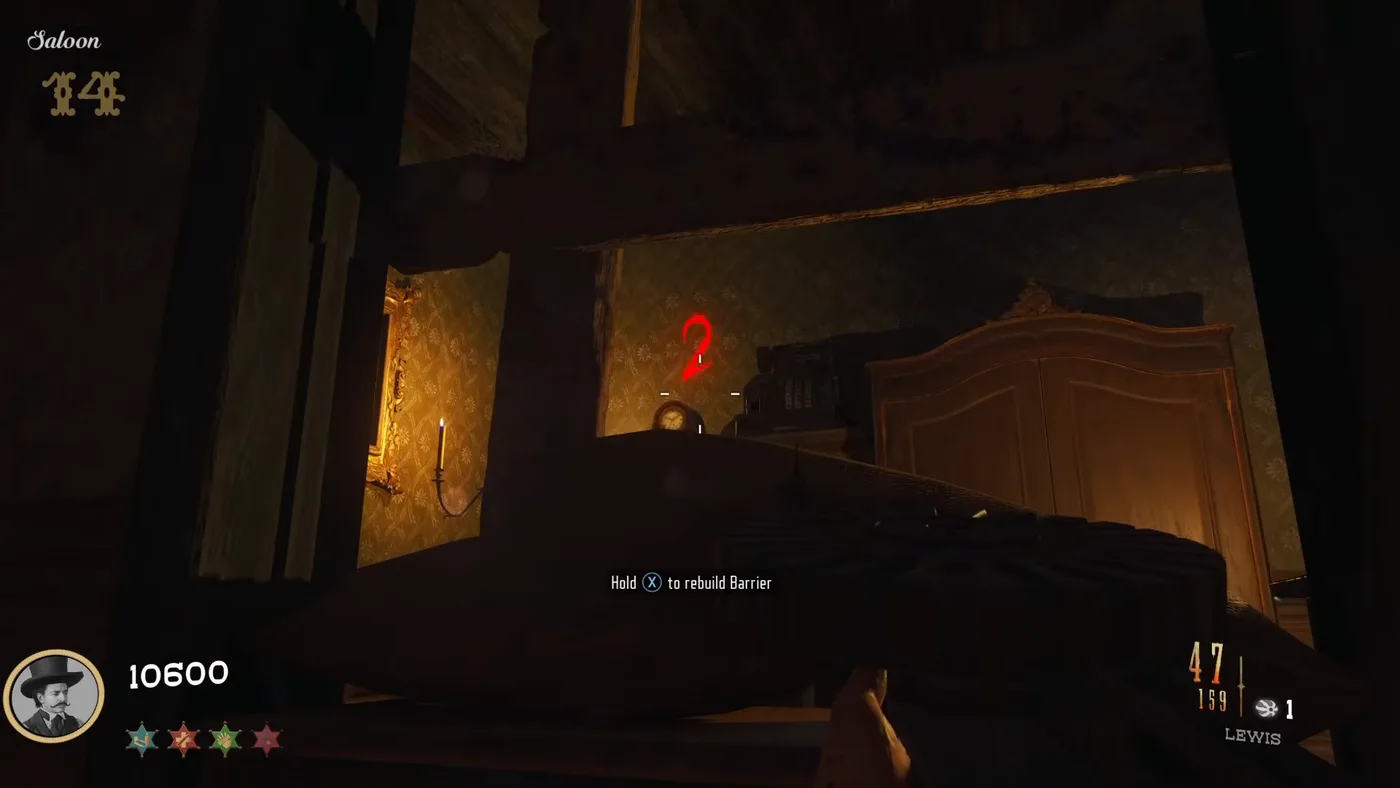
  2. Find the three digits of the game, which change every game: the blue one under the roof of the well, at spawn; the yellow one on the wall at the top of the Hotel staircase; the red one in the window barrier of the Saloon, next to the bar.
  3. Set each digit of the panel by shooting or knifing it, then confirm. The barn opens on the Pack-a-Punch Machine, and Doctor Emmett Brown appears at its door.

Two other codes do something on this panel: 935 gives a Wunderwaffe DG-2 and 115 plays a song. Flapix warns that they only work after the panel is opened with the key and before the three digits of Pack-a-Punch are entered, because the panel shuts down afterwards. They are on the secrets page.

A blue digit 4 painted under the wooden roof of the well of the spawn, at night, Wanted BO3 Custom, Call of Duty Black Ops III Zombies

The blue digit

Under the roof of the well of the spawn: a blue 4 in this game.

A yellow digit 9 on a wall at the top of a staircase, with the prompt to open a door for 750, Wanted BO3 Custom, Call of Duty Black Ops III Zombies

The yellow digit

A yellow 9 in this game, on a wall at the top of a staircase, next to a door of 750 points; the guides place it at the top of the Hotel staircase.

A red digit 2 inside a boarded window of the Saloon, with the prompt to rebuild the barrier, Wanted BO3 Custom, Call of Duty Black Ops III Zombies

The red digit

In the window barrier of the Saloon, by the bar: a red 2 in this game.

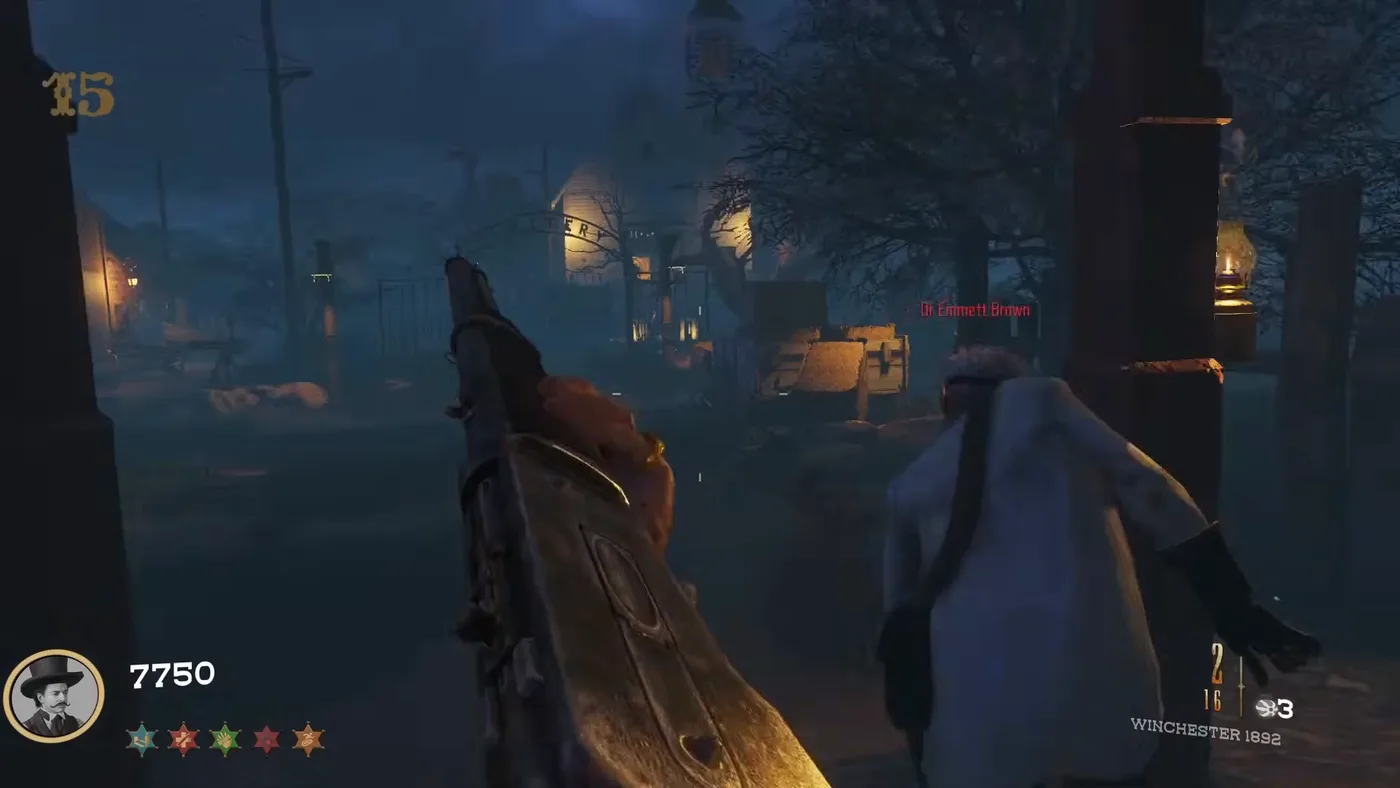
Doctor Emmett Brown with white hair, seen from behind as he runs through the town, his name in red above him, Wanted BO3 Custom, Call of Duty Black Ops III Zombies

Doctor Emmett Brown

Named “Dr Emmett Brown” above his head, he runs off through the town once the barn opens.

Step 4: the ghost round and the church key

Round 12 is a special round of ghost witches, the ghosts of the Black Ops II map Buried. They steal points on contact but die quickly; Pankake101 advises to hold a corner in pairs, each player watching one side. The last ghost drops the church key. The guides open Pack-a-Punch before this round, and OGJasperG is not sure that it is required.

Step 5: the portal, the bow and the Hell’s Retriever

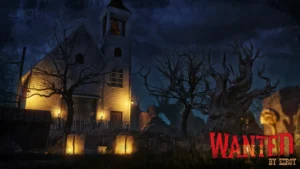
Workshop screenshot of the white wooden church with its bell tower, among dead trees and gravestones, Wanted BO3 Custom, Call of Duty Black Ops III Zombies

The church

A Workshop screenshot of the white church of the town, among dead trees and gravestones. Its key comes from the ghost round, and the portal stands inside.

The square fiery portal glowing inside the church, between wooden pillars, Wanted BO3 Custom, Call of Duty Black Ops III Zombies

The portal

The fiery portal inside the church, which leads to the campfire of the bow.

  1. Open the church with the key. Inside stands a portal: jump into it.
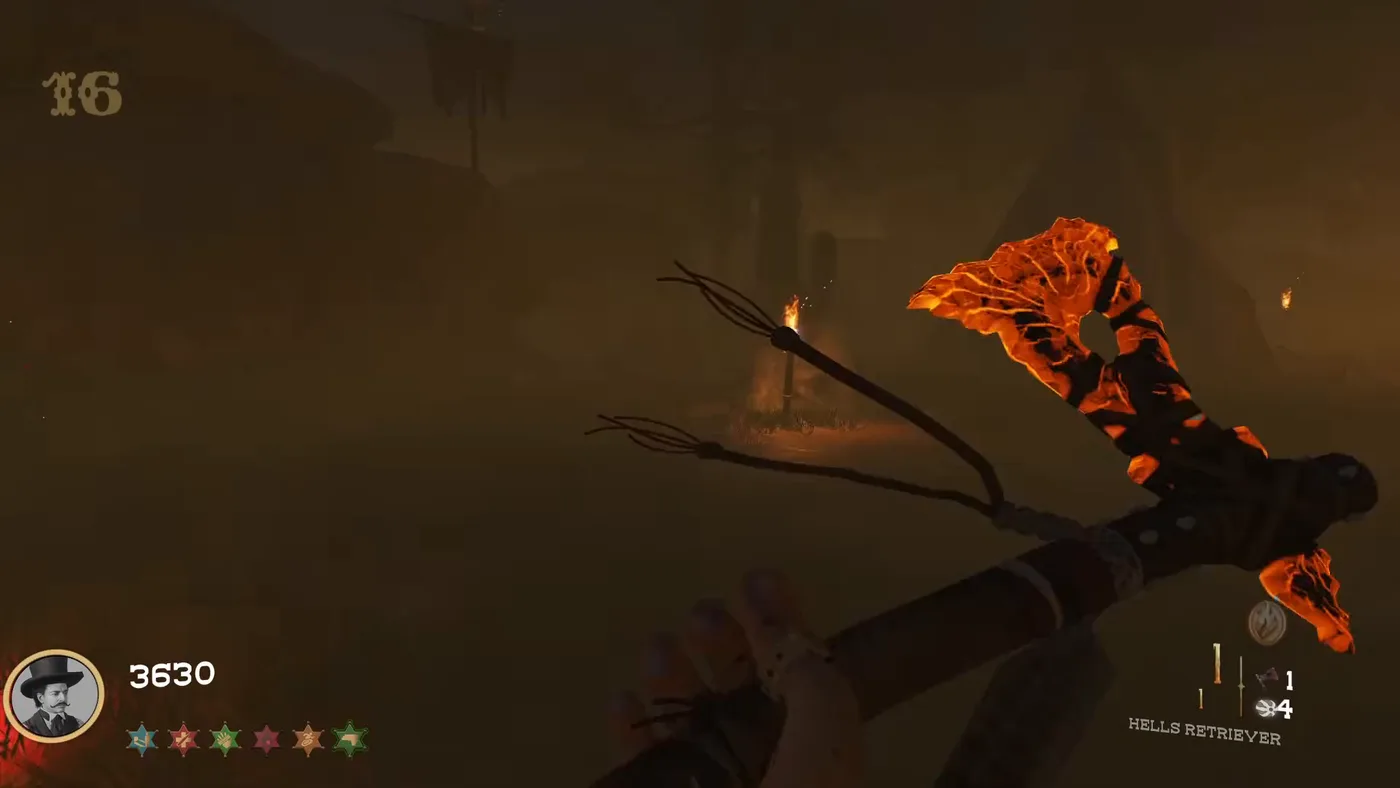
  2. It leads to a campfire with a totem pole. Pick up the bow, a specialist weapon, in front of the player, and, behind, the Hell’s Retriever, which is optional; Not So Serious Gaming notes that it takes the place of the tactical grenades.
  3. Jump back into the portal to return to the town.
The bow planted in a campfire behind the portal, with the prompt Press to pickup Hero Bow, Wanted BO3 Custom, Call of Duty Black Ops III Zombies

The bow

Planted in the campfire behind the portal; the prompt reads “Press to pickup Hero Bow”, and the HUD names it the Primal Bow once in hand.

The Hell’s Retriever tomahawk held in hand, glowing red, in the dark world behind the portal, Wanted BO3 Custom, Call of Duty Black Ops III Zombies

The Hell’s Retriever

The tomahawk of Mob of the Dead, taken behind the bow.

Step 6: the two flags and the totems

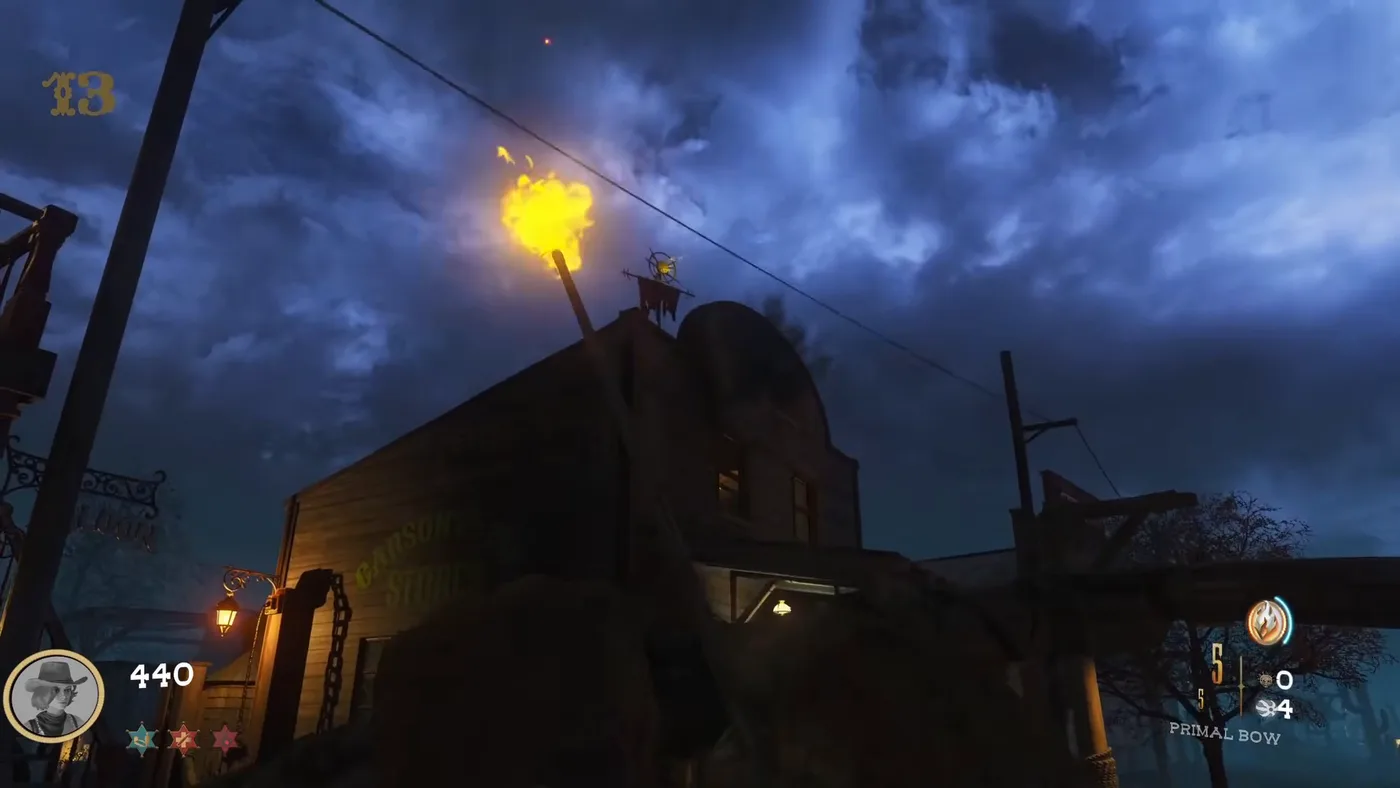
  1. Two flags have appeared on two roofs: one on the Grocery store, the other on the train station of the spawn. Shoot each one with the bow; Sassy Asi hit one with a grenade, and Pankake101 and AuRasAuCe note that the bow does not shoot straight, so aim just below the flag.
  2. Each flag raises a totem pole out of the lava. Kill zombies around it until it sinks back: Pankake101 notes that the totem of the spawn catches souls from a wide area, the other only from one side.
  3. Pick up the part that each totem leaves behind: the flux capacitor and the clock, two parts of the DeLorean.
A flag burning on top of a wooden building after being shot, under a stormy night sky, Wanted BO3 Custom, Call of Duty Black Ops III Zombies

A flag on fire

One of the two flags burning on a roof after being hit, in the guide of Sassy Asi.

A totem pole with fire at its foot, souls flying to it from the zombies killed by the Annihilator, Wanted BO3 Custom, Call of Duty Black Ops III Zombies

Feeding a totem

A totem pole fed with the souls of the zombies killed around it.

Step 7: the last totem

Go back through the portal of the church: the third totem pole stands at the campfire, where the bow was. Fill it with souls; it gives no part. The players are sent back to the town at the end, with zombies around them, and Pankake101 warns that a player who goes down here can as well restart. Pankake101 Pack-a-Punches a weapon with a large ammo pool before this totem.

A totem pole standing over a campfire in a dark flooded place, Wanted BO3 Custom, Call of Duty Black Ops III Zombies

The last totem

A totem pole over a campfire, filmed by Sassy Asi behind the portal of the church, in the same round and with the same score as the pickup of the bow; the guides place the last totem there.

Step 8: Leroy

A blue circle now glows in the Graveyard. Once ready, every player stands in it and holds the action button: the boss fight starts. Leroy, wearing a cowboy hat, comes with dogs that keep spawning while the fight lasts. WOOLF and Pankake101 fight it in the wide space of the spawn, and Pankake101 kills it with headshots from a Pack-a-Punched weapon, saying that the wonder weapon does little damage to it; Flapix finds the Death Machine power-up the most efficient against it, and notes that the whole map is open during the fight. The HUD names the boss Arthur Leroy above its health bar. The change notes of version 1.7 lowered the health of the bosses, and version 1.8 added random power-up locations to the boss fight.

Pankake101 shows a co-op method: one player leads the zombies to the other side of the map, so that the other player is left alone with Leroy. Leroy drops the last part, the plutonium; the guide warns to keep shooting until it is really dead, even when its health bar looks empty.

Step 9: escape in the DeLorean

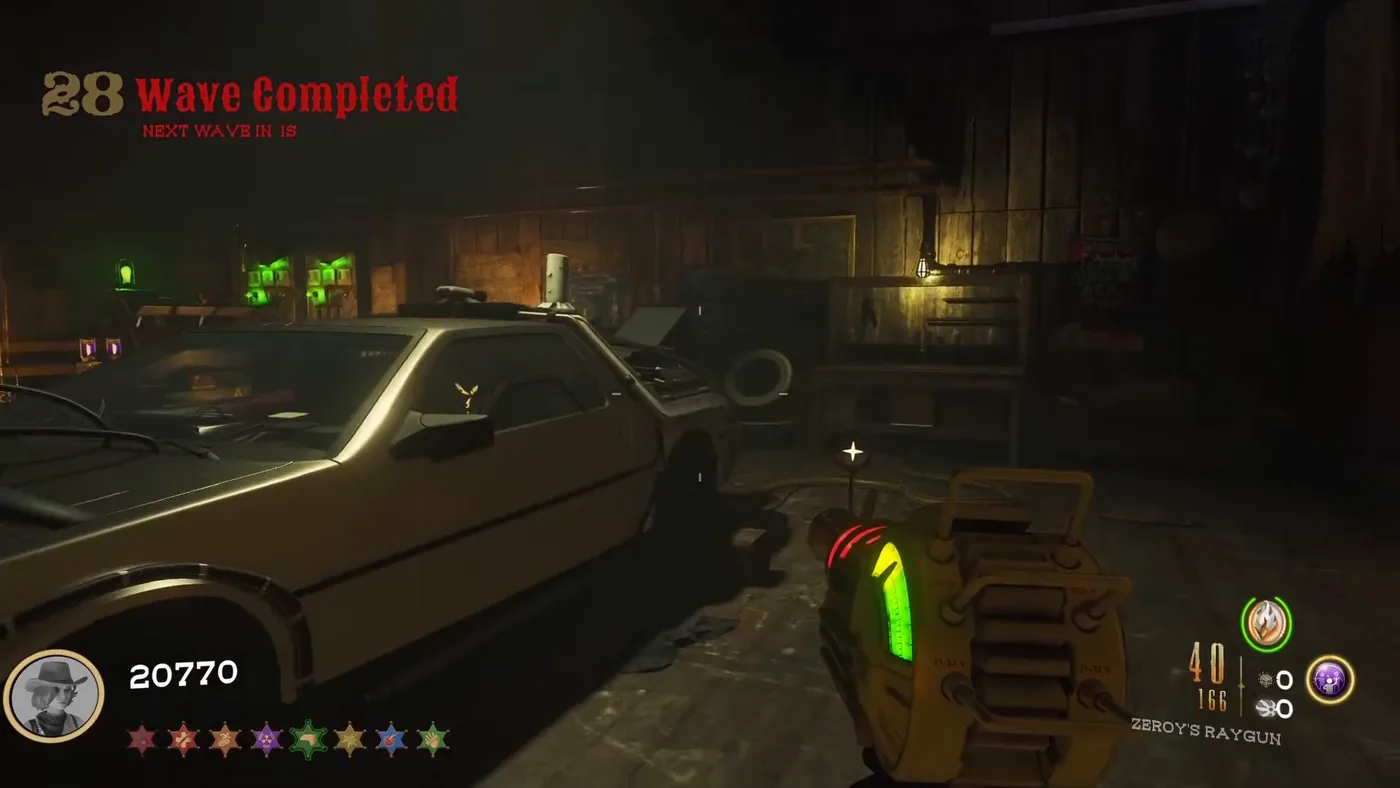
The silver DeLorean parked in the dark barn of Pack-a-Punch, Wanted BO3 Custom, Call of Duty Black Ops III Zombies

The DeLorean

The DeLorean of Doc Brown, parked in the barn of Pack-a-Punch, waiting for its four parts.

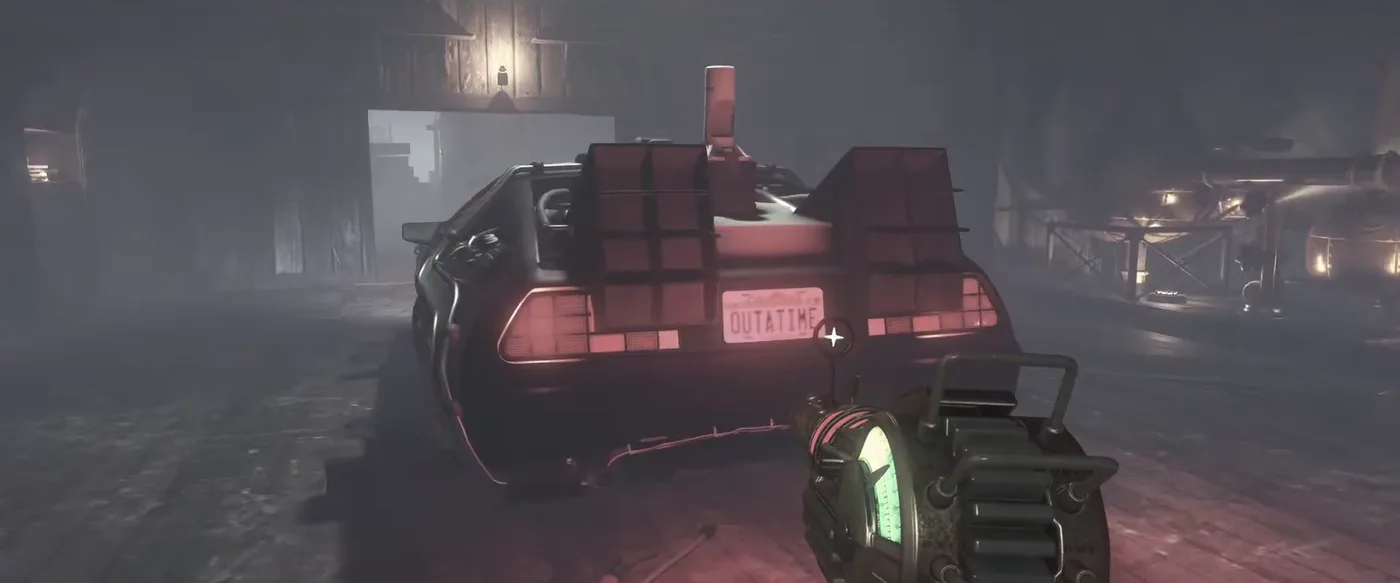
The DeLorean driving off through the foggy town in the ending cutscene, seen from behind, Wanted BO3 Custom, Call of Duty Black Ops III Zombies

The escape

The ending cutscene: the DeLorean drives off through the town.

Bring the plutonium to the barn of Pack-a-Punch and add the parts to the DeLorean. A cutscene plays and the game ends: the players escape Wanted.

Rewards

No source read for this book mentions a reward beyond the ending cutscene. The Workshop page has a pinned discussion where ZeRoY collects the fastest completion times.